How to embed widgets in Blogger?

The fastest and easiest way to add new features to your blog is by embedding widgets such as Twitter and LinkedIn in the sidebar of your blog. Social media platforms such as Twitter and LinkedIn are powerful weapons for SEO. In this article, I will show you how you can embed widgets such as Twitter and LinkedIn into the blog.

linkedin and twitter

How to embed Twitter in the blogger?

Follow the steps to embed twitter in the blogger.

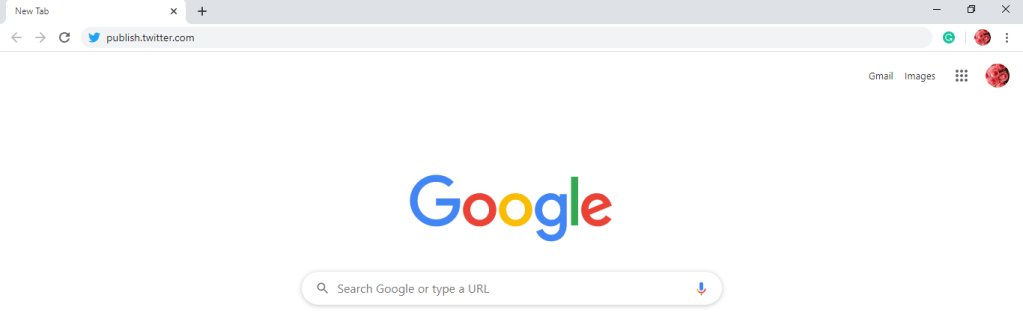
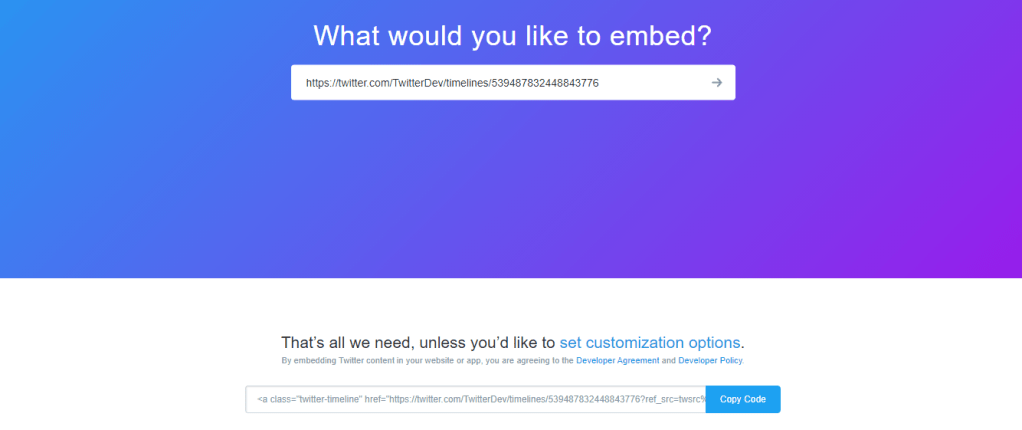
Step 1: Search publish.twitter.com.

step 1 new tab

Step 2: You can see a question as ‘What would you like to embed?’.

enter a twitter URL

Step 3: Enter your Twitter URL in the provided space. Below that, a code will display. Copy that code.

copy code

Step 4: After copying code, go to blogger and select layout. In sidebar-right-1, Select HTML /JavaScript.

blogger layout

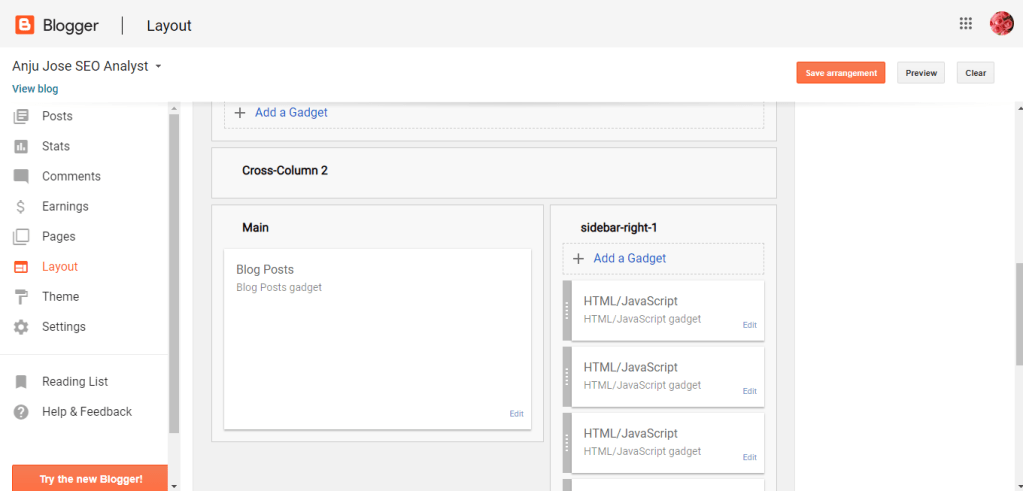
Step 5: Paste the copied code in the content. Press the ‘Save’ button.

configure HTML/Javascript

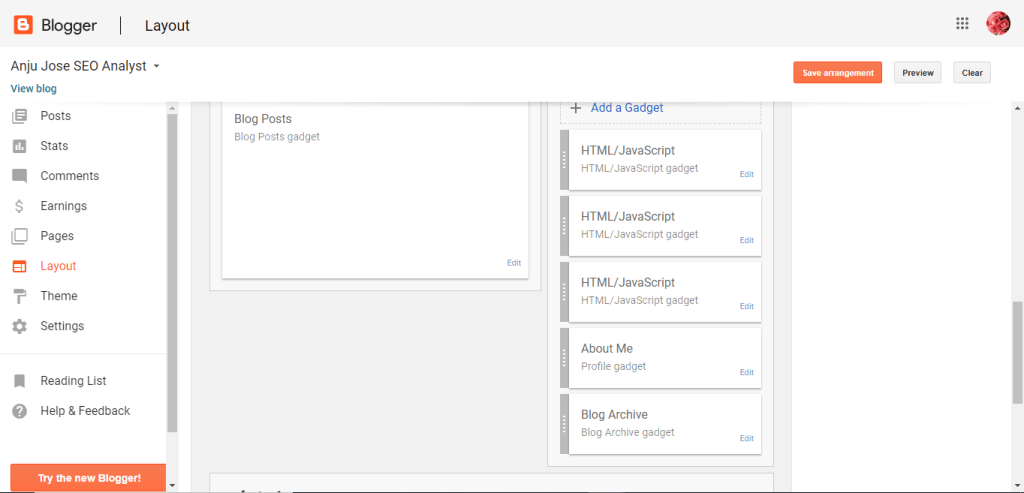
Step 6: Click on ‘Save arrangement’.

save arrangement

After finishing these steps, refresh the blogger page. So the Twitter widget is successfully added in the blogger.

How to embed LinkedIn to the blogger?

Follow the steps to embed twitter in the blogger.

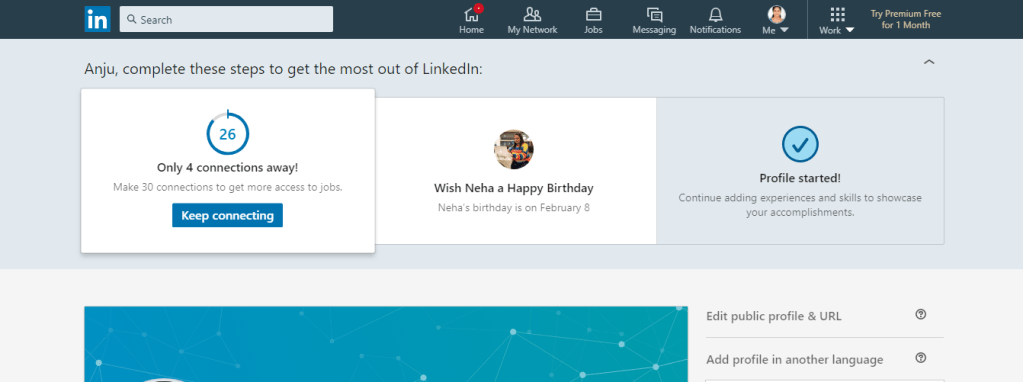
Step 1: Get into the LinkedIn profile. Select ‘ Edit public profile & URL’.

linkedin profile

Step 2: Select ‘Create a badge’.

create a badge

Step 3: A public profile badge builder will visible. Copy the code of step 1 in the visible page.

public profile badge builder

Step 4: Choose a badge from the given options. Copy code of the required badge.

choose badge

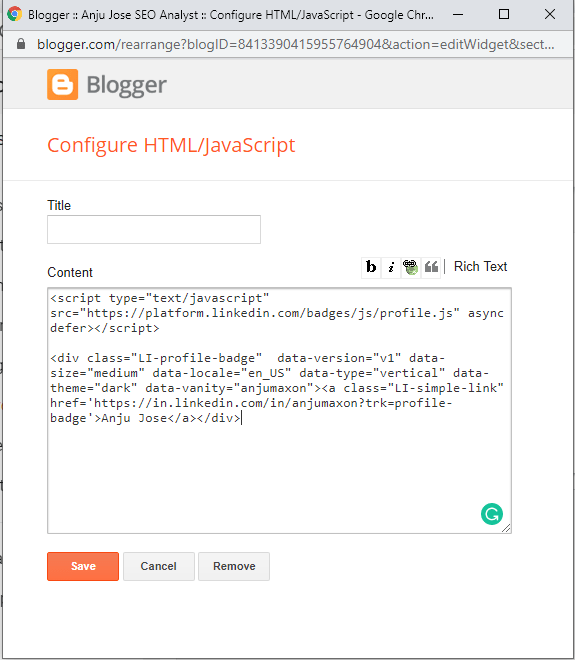
Step 5: Paste the codes in Step 1 and Step 2 in the content section. Select ‘Save’.

configure HTML/Javascript

Step 6: Select ‘Save arrangement’.

save arrangement

After finishing these steps, refresh the blogger page. So the LinkedIn widget is successfully added in the blogger.

I hope you got some idea in the topic ‘How to embed widgets in Blogger?’. You can read the article about ‘A glance to bing optimization’  here.

A Glance to Bing Optimization

Bing logo

Bing is a popular search engine by Microsoft. It is launched on 3rd June 2009 and written in ASP.NET language. Even if you are already verified your site through Google search console, it’s important to submit your website to bing webmaster tools for verification. The web service providers such as Yahoo and AOL are powered by Bing. The website reach for Yahoo and AOL is quite large. By, ensuring this you can improve the web traffic sources.

How to Setup Bing Webmaster tools?

bing webmaster logo

Sign in with Google account from the home page. Getting into the dashboard you can see an ‘ADD’ button to add the websites. Paste the URL of the website in the provided space. After that, you will be prompted to add a sitemap. Paste the URL of the website with the sitemap location within the space given and click on ‘ADD’.

Bing webmaster tool

What is a site map?

A site map is a model of website contents in an XML document or a hierarchical list of pages with links. It is designed to help both users and search engines for the navigation of sites. The maximum URL that can be included in the site map is 50,000. If it exceeds, the site map can be split into categories.

How to verify your ownership of the website?

There are three verification methods to verify the ownership of a website. They are

  • XML File authentication
  • Meta tag authentication
  • Add CNAME record to DNS

Method 1: XML File authetication

Step 1: Click BingSiteAuth.xml to save the XML file to your computer. An XML file contains the customized verification code.

Step 2: Upload the file to the root directory of the registered site.

Step 3: Click verify

Bing verification of xml file

Method 2: Meta tag authentication

Step 1: Copy the meta tag with your custom ownership verification code to the clipboard.

Step 2: Open your registered site’s default page in your web development environment editor.

Step 3: Paste code at the end of the head section.

Step 4: Upload the revised default page file containing the new meta tag to your site. 

Bing verification of meta tag authentication

Method 3: Add CNAME record to DNS

Step 1: Access to your domain hosting account.

Step 2: Inside that account edit the CNAME record to hold the verification code (series of numbers and letters)

Bing verification of adding CNAME record to DNS

Step 3: When complete, verify your ownership of the site.

I hope you got some idea about Bing Optimization. You can read the article about ‘ A disclose to Google Search Console and Google Analytics’ here.

A disclose to Google Search Console and Google Analytics

Google Search Console and Google Analytics are two strong SEO tools in the marketing field. Both provide fuel to your success on the web.

Google search console v/s Google analytics

Google Search Console

Google Search Console is a free service of Google. It helps to monitor, and troubleshoot your site’s presence in Google Search results. Search Console helps you to understand and improves how Google searches your site. It is a site-oriented tool.

Performance in Google Search Console

Search console offers the following services:

  • Make sure that Google can find and crawl your site.
  • Fix indexing problems.
  • Request re-indexing of new or updated content.
  • View Google Search traffic data of your site.
  • Receive alerts when Google encounters indexing or spam on your site.
  • Show you which sites link to your website.

Who should use the Google Search console?

Anyone owns a website can use search console such as Business owners, SEO specialist or marketers, Site administrators, and Web developers.

Google Analytics

Google Analytics is also a free service given by Google. It interprets and processes website usage data and identifying trends to increase the website presence. Google Analytics is a user-oriented tool.

Performance in Google analytics

Google Analytics provided the following services:

  • Gives site owners a snapshot of traffic statistics.
  • It provides stats like total site visits, bounce rate, average time on site and demographic information of members visiting on your site.

Both are useful SEO tools on their own. These tools give easiness to work with websites in Google.

I hope you enjoyed this blog post and got an idea of how to create a free blog. You can read my blog about, Free blog: How to create?

Free Blog: How to create?

A blog is a website that mainly focuses on the written concept known as blog posts. Blogging is a strong SEO tool. Blogger and WordPress are the best tools to create a free blog on Google. One can publish the ideas and thoughts of their own through blogging. browsers such as Chrome, Firefox, Safari and MS Edge for Blogging.

Create free blog

BLOGGER

Blogger is created by Evan Williams in 1999 which is written in Python language. It is an easily accessible platform on Google.

Blogger icon

Follow the steps to create a free blog.

  • Step 1, Sign in to Blogger with the e-mail and password.

Enter a valid email address that has not used for Blogger account

Blogger sign up
  • Step 2, On the left, click the down arrow.
  • Step 3, Click New blog.
create blog
  • Step 4, Enter a name for your blog.

Enter your blog name as the title. This is what people assume about your blog. Make it unique and truthful according to the content in the blog. Put the blog address. If the blog address is available a tick mark will appear.

  • Step 5, Choose a blog address or URL.
  • Step 6, Choose a template.

Select a template that suits your blog.

  • Step 7, Click on create blog.

You successfully created a free blog in the blogger. Start blogging !!!

WordPress

word press icon

WordPress is a content management system (CMS) based on PHP. It is initially released on 27 May 2003. WordPress is an excellent website platform for a variety of websites such as blogs, e-commerce, Business, News, Photography, etc.

Follow the steps to create a free blog in WordPress

  • Step 1, pick your blog name, type it in the bar, click your blog and continue.
create free blog step 1

Step 2, You have to enter the email address, username, and password. If finished click on the next step.

create free blog step 2
  • Step 3, You will be given the option to find the custom address. You can skip this step by clicking on the ‘No Thanks’ button.
create free blog step 3
  • Step 4, Select a theme for your blog. If finished, Click on ‘Next Step’.
create free blog step 4
  • Step 5, Pick the free option with the Select button and then click start with free. You can create new blogs from here.
create free blog step 5

So, you successfully created a free blog in WordPress. Spread your thoughts to the world!!

I hope you enjoyed this blog post and got an idea of how to create a free blog. You can read my blog about Google Analytics.

Google Analytics: A beginner’s guide

Google Analytics is a web page traffic analysis application that provides real-time statistics and analysis of user interaction with the web page. Google analytics interprets and optimize the website’s performance and helps website owners to analyze their visitors. Google Analytics can track all types of digital media and referring banners, advertisements, e-mail and integrates with other Google products.

Google analytics

Which are traffic sources in Google Analytics?

Organic Search Traffic: 

A user comes to a site directly from a search engine.  If it is a paid advertisement on search engines, those visitors will count as Paid Search instead.

Referral traffic : 

A user clicks a link to a site from a page on another website.

Social traffic :

 A user clicks on a link to a site from any social channel, such as Facebook, Twitter, LinkedIn, or Instagram.

Direct traffic: 

A user directly types into a website URL or clicks on a link from an email, PDF, or saved bookmark. Any traffic that Google doesn’t have the source information on is also considered as direct traffic.

Paid Search: 

A user clicks on a paid advertisement in a search engine such as Facebook, Instagram or Twitter (most commonly via Google AdWords) that leads back to your site.

Steps for use Google Analytics to track website

  • Sign into Google Analytics with the Google account.
sign in to Google analytics
  • Click on the admin button on the bottom left sidebar of the dashboard
  • If you are new to Google Analytics create an account or if you already have an account select the account
  • Click on the drop-down menu to create a property.
  • Click on the website or mobile option and your site’s name and URL
  • Choose your time zone and industry
New account in google analytics
  • Click on tracking ID.
Track ID of website
  • Install the tracking ID on your website.
  • Paste the tracking ID in Analytics.
  • Paste tracking ID in the theme section of the blog.
  • Save the theme.

By tracking visitors from all the referring sites, Google analytics will provide the response of a marketing campaign. Google Analytics works through a snippet of Javascript on the website to be monitored. 

Hope you enjoyed this blog post about Google Analytics.

Design a site like this with WordPress.com
Get started